5.20.2010

Wonderful Wallpaper

After the floors came up, the walls had to come down (anyone else think of that song?) In preparation of the wallpaper removal, the baseboards had to come out since the wallpaper went behind them. This will make it easier to paint everything too. Welcome back, Wonderbar!


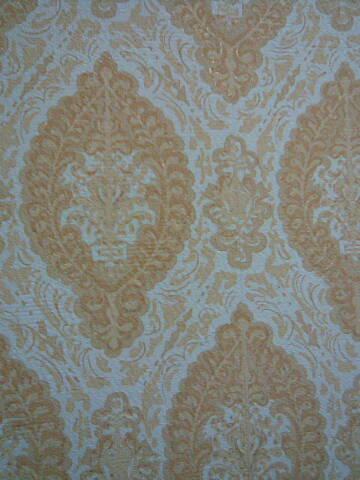
I took a tip from the floor guy and labeled all of the pieces so that we can easy put them back where they belong. You can see that really beautiful wallpaper in the background.


After removing all the baseboards, light switch covers (these were also covered in wallpaper by the way) and outlet covers, we were ready to rip. I read up on wallpaper removal and had asked several people about their experiences. I rented a steamer and prepared for the worst. As it turned out, we had the easiest wallpaper removal on the planet. Here's Jordan ripping down a piece of full width, floor to ceiling section in one big pull. (Sorry, I tried to get this video off my cell phone, but it didn't work. Imagine Jordan pulling down a large strip of paper, followed by him going "ARGHHH) as it falls on top of him. Good times.)

After that, we were left with all the glue on the walls. We tried using the steamer here and found that it was a long, wet and sticky process. Jordan actually spent 5 hours doing the hall this way until I brought over a couple of spray bottles I picked up. New process: spray with warm water, wait a few minutes, scrape off glue, wash walls with scrub sponge (got any remaining tricky spots), wash walls with clean water and big sponge. Here you see the process and the final scrape. That bucket is full of the glue.


And there you have it. We ended up not even needing the steamer at all and saved ourselves couple of bucks. It took 3 nights because of the amount of wallpaper that came down. We also were helped out by Tom and Sue (she ran a very tidy clean up for us) and my little sister, Bri. Next step, spackle, prime and paint!

5.13.2010

Two short weeks..

Sorry, I haven't been good about making updates here. We've been working on the house almost every night till around 11, then driving back to MPLS. I've just been too tired for posts, but I'm feeling good now so here's a doozy!

Let's start back at what happens after we pulled the carpet out of the house. In the one room (soon to be the craft room/office), we were left with some beautiful wood floors surrounded by a tack strip. This is what holds the carpet down. With the help of a my hammer and a Wonderbar (Only the absolute greatest tool ever invented! Seriously, I've used it for pretty much everything!), I pried up all of the tack strip. See how it's done.


That was by far the easiest room. After taking off the doors to the closet and the room, it's ready for refinishing. The rest of the house wasn't so easy. The rest of the rooms on the main floor had carpet (new, but ugly) except the kitchen which had the most God awful yellowish (not sure if it started out this color) linoleum. All of it had to go. Pulling the carpet was an easy task. We just started in one corner and pulled. Since it's new carpet, we rolled it nicely and taped it up in the hopes of someone taking it off our hands via Craigslist. I tried to get a charity to take it since it's new, but they were uninterested. I kept some of it and put it in my laundry room. This instantly made it feel nicer in there.

Back to the floors. What was under the carpet/linoleum was a second subfloor. They put this in when a house has real wood floors and carpeting so that the carpet will be at the same level as the wood floor. If you layed the carpet on the first sub floor like the wood is, the carpet would be a bout 3/4" lower than the wood floors. This second sub floor all had to go for the new hard wood to be layed down. Our floor guy told us how to start. Get a circular saw and cut a square out of the middle of oone of the sub floor sections, then pry it up (hello Wonderbar!).


Doesn't sound too bad, right? Well it wasn't hard really, just SUPER time consuming. The first piece was the hardest since we were prying it out by the middle. After that we pryed from the edges. We often had to cut the floor pieces in half to make this easier. Here we are getting down and dirty with the floor. (p.s. Without the help of my in-laws, we may still be at this step! Thanks Tom and Sue!!!!)


Sometimes pieces came up nicely, other times not so much. There were a zillion big nails holding it all in place. Sometimes they came out with the floor. Sometimes they didn't and the old Wonderbar had to pry them out after the floor was out.

While Jordan was working on the prying, I started in on getting that linoleum up. thanks to my dad, we had the perfect tool. It was basically a scraper on the end of a stick. I used this tool a few years ago when we put in a new kitchen floor for my parent's. It was kind of fun.


Since the kitchen cabinets were installed on top of the second sub floor, we had to rent a toe kick saw. This is made for cutting right along the edge of cabinets. Jordan was a champ and did a really great job. I had to show everyone how manly he felt using it! (All those specks are from the insane amount of saw dust kicked up from the saw.)


All of this took just a couple of days, but they were definitely long ones. Sue Roske was a champion cleaner upper after everyone. See?


Underneath all that extra sub floor was a layer of thick paper. This also had to come up, but not till the wallpaper came down...

5.04.2010

A new project

So, we are finally home owners!  The house we bought was built in 1968 and looks it.  The previous owners had some questionable taste, especially in wallpaper.

Exhibit A: (and yes, that's fuzzy and the old owner had coordinating bath accesories and towels)

Exhibit B: (yup, those are weird muti-tan geometric shapes)


Exhibit C: (Ok, this is in the master bath and I like this one)

Despite the wallpaper (and their choice to cover hardwood floors with carpeting) the house has great bones.  The first thing we're going to do is use our tax credit and put in hardwood floors throughout the entire main floor (currently only 2 bedrooms have it).  We bought the house on Thursday and on Friday we started tearing into it.  The first thing to go was the nasty carpet in what will be my office/craft room.  The rest of the house actually had new carpet, just not that room.  Jordan and I were closing the windows for the night to head back into the city when I decided the room smelled gross.  I poked at the corner of the carpet and before Jordan even got back from the windows the carpet was out!  Grosser than the carpet was the old pad underneath.  My hands stunk for the next hour even after being washed.

I'm going to try and be good about posting up our progress, so stayed tuned for what happened after the carpet was out...

3.28.2010

Pillow Talk

I have wanted to update my pillow situation for my bed for awhile now. Paging through Pottery Barn or Crate and Barrel's catalogues always left me wanting a more beautiful bed. I started the beautifying process by updating my duvet cover. I have a really nice one from Ikea that's soft and nice (see it here), but a little boyish. I found a new one at Pottery Barn (over 50% off!) that I had to have. My bed immediately looked nicer.

Next I needed to update my body pillow cover. I purchased one from Target awhile back to help the bed situation, but it no longer went with my new duvet cover.


I was on the look out for a new cover when I noticed a stack of tapestries I had in my closet. I bought a bunch of them back when I worked at Urban Outfitters whenever they went on sale for $5. You just can't buy fabric that cheap. My bedroom walls are actually completely covered by tapestries for a fabric wallpaper effect. The hubby just told me the other day he loves that about our bedroom!
Back to the bed. One of the tapestries looked just right for a new pilow cover so I pulled it down.


I didn't want to make a zipper case (like the Target one was) because I thought it might get too complicated. I decided to go with a pocket enclosure style cover. I didn't have a pattern but I figured a pillow case has to be one of the easiest things ever to sew. I found some plain white scrap fabric I had and experimented. I got it right on the first try! All that was required were 4 seams. 2 were for finishing the ends of the fabric, then 2 sewn up the sides to creat the case. So easy.


I whipped out the tapestry and cut out the length I needed. I also cut a duplicate piece out of plain white linen I had so that the case was fully opaque. My body pillow is made of brown fabric and I didn't want to see through the one layer of tapestry. I carefully pinned everything together and sewed it up. I actually only needed 2 seams for this one becuase the tapestry already had a finished edge for the pocket part. I stuffed my pillow inside and stepped back.


My bed was looking better already but it was still missing something. I decided I needed a few large square pillows to hide our pillows that we use to sleep with. I own a ton of extra pillows in the exact size I wanted (my couch purchase came with more than 10 pillows) so now I had to find a good fabric.

I got an e-mail from Hancock about all linens being 40% off so I clicked on over to their site. Right there on the hompage was the perfect fabric staring back at me! I knew it was the one so I navigated to the linen section only to be totally disappointed to see that they didn't have it online. That same day I stopped in to my local store and checked there. No go. The next day I stopped at another Hancock's. Nothing there either. At this point I was pretty irritated. Who puts a picture of a product on their homepage and then doesn't sell it anywhere?!?! I contacted the head offices to see what was going on and if the fabric was available anywhere. I got a response the next day saying the fabric would ship to Wisconsin stores (no MN!) in mid March. I noticed that they removed the picture from their site that same day. I patiently waited for March and called the stores in WI each week to see if the fabric had come in. Nothing, nothing, nothing! I was about to give up when I saw the fabric was suddenly available online! I rushed over to my store and what do you know, there it was! They even had 2 colors, purple and green! I got a swatch of each to bring home and see what went with my bed. The purple ended up being a little too dark, but the green (the one I originally wanted) was perfect. I went back the next day and bought 3 yards.


The next day I whipped up three more cases, this time making all 4 seams. Still super easy! I stuffed the pillows and BAM, bed beautiful! I love making my bed now because it looks so pretty when I'm done. Lovely!

3.13.2010

For Kathy

Well, actually it's for Laura and Chris. I finally got them their wedding gift (only 5 months late). I think it may have been worth the wait if you ask me. I'd been trying for months to think of something special for L and C. It came to me when I got an e-mail from Snapfish about wrapped canvases being on sale. I've always thought wrapped canvas photographs were awesome so I checked it out. Even on sale, they were a little more than I could afford. I got to thinking that I could probably make a wrapped photo canvas myself with a little work.
So I started digging around the internet and got some ideas. I headed over to Michael's where I picked up some iron on transfer paper you can run through your ink jet printer.


Then I went on over to Joann's and purchased a yard of duck cloth. It's sort of like canvas, but not quite as thick.The last thing I needed was a frame to wrap the picture around. I poked around while at Michael's and Joann's but wasn't willing to pay $5 for a frame that wasn't the exact right size. That's when I went on over to The Home Depot. I bought a 2x1 that was around 6 feet long for 62 cents.
At this point I needed to figure out the photo (I actually ended up doing 3!) I wanted to use so I would know how big to make the frame. I looked at my pictures from the wedding and picked out 2 that I loved. I decided to make a third frame for a monogram I created with Word.

I don't own a saw, so I went to my parents' house and borrowed theirs. My dad couldn't find his miter saw, so my first attempt to make a frame was with a regular hand saw. This proved to work, but took forever to do one piece!


That's when I brought in the circular saw. It was slightly difficult to keep at the 45 degree angle I needed, but nothing some rasping and sanding couldn't fix. I got all my pieces cut in no time at all (plus a few extras just in case).


I found a square and started to piece together the different pieces. I roughly fit them all together to form 3 frames. I labeled each piece with a number and letter so that it would be easy to put them back together when I got home. I brought the square with me and used it to help make sure my frames would be good. I got out my handy staple gun and attached the frames.


After the frames were done, I got to printing out my photos. I had a few that didn't turn out so well, but I ended up with three transfers ready to be ironed on. It should be noted that the prints had to be a mirror image so that when they where ironed on they would be the correct direction. I definitely wasted one transfer by forgetting to do that.

Once they photos were printed and dried, I got out the duck cloth and ironed out the wrinkles. p.s. I had the iron on for this picture and took too long to take it. I was left with a nice burned in iron print that I had to cut off and throw away. Oops!


I carefully set my new transfers down and went to work with the iron. The hardest part was letting them cool down before peeling off the paper (and keeping the cat from pouncing on everything since I was working on the floor)!


Once cooled, I peeled back the paper and revealed 3 awesome photo canvases. At this point all that was left to do was wrap them around the frames. This was really easy actually. I pin tucked and folded in the corners, stapled them down, and they were done!


This was a really fun project and very budget friendly. Here's the breakdown.
Photos - free, I took them
Iron-on transfers - $4 with my 40% off coupon
Wood for frames - $.62
Duck cloth - $4 for the yard (this could have been even cheaper, but I forgot my coupon)
Tools - free, my dad owned the saw and I owned the staple gun

There you have it. 3 sweet photo wrapped canvases all for under $10! I will absolutely do this again.